
5 Simple Ways to Create More Beautiful Food Photos & Reels
Have you ever styled a beautiful dish, found the perfect light, picked out your favourite props… only to take the photo and feel like something isn't quite working? I've been there! Sometimes, all the ingredients are right, but the image still feels a little flat, cluttered or just not quite how you imagined it.
Often, the missing piece is composition. Composition is how you arrange everything within your frame, from the food itself to your props, surfaces and those little finishing touches. It's what helps guide the viewer's eye, create a sense of balance and tell a story through your image. And it's just as important when you're creating food videos as it is when you're taking photographs.
So, as part of my food styling series, I'm sharing five things I consider when composing a food photo or reel. They're simple ideas to keep in mind next time you're setting up a shoot, without needing a whole new collection of props or fancy equipment. PLUS, you can get access to ALL nine of my composition overlays in The MOTION Method: my Food Videography & Reels Course. Use CODE COMPOSITION15 for 15% off!

1. Decide what the hero is
Before you start styling, ask yourself one simple question: what do I want someone to notice first?
It might be the glossy chocolate topping on a brownie, the layers of a Victoria sponge or the packaging of a product you're shooting for a brand. Whatever it is, give that element the attention it deserves. It's easy to get carried away adding props, ingredients and little details because they all look lovely individually. But when everything competes for attention, the overall image can become confusing.
I like to think of props as supporting characters. They help tell the story, create atmosphere and give context, but they shouldn't steal the show. For your next shoot, try removing one or two elements before you take the photograph. Sometimes, a little editing of the scene is all it needs.
Styling note: if you're creating content for a brand, this becomes even more important. The food might be the star, but the product or packaging may need to be the main focus.
2. Think about where the viewer's eye will go
Good composition doesn't happen simply because everything looks pretty together. It's also about how the different elements work together to lead the viewer through the image. Think about the direction of your cutlery, the placement of an ingredient, the curve of a plate or the way a napkin folds across the surface. These details can all help create a sense of movement and draw attention towards your subject.
You might have heard of the rule of thirds, which divides your frame into nine sections to help you position your subject. It's a useful starting point, particularly if you're unsure where to place the hero. But don't feel you have to follow it every time. A beautifully centred composition can be just as effective when you're aiming for something bold, simple or symmetrical.
The trick is to make decisions with intention, rather than placing everything in the frame and hoping it works.
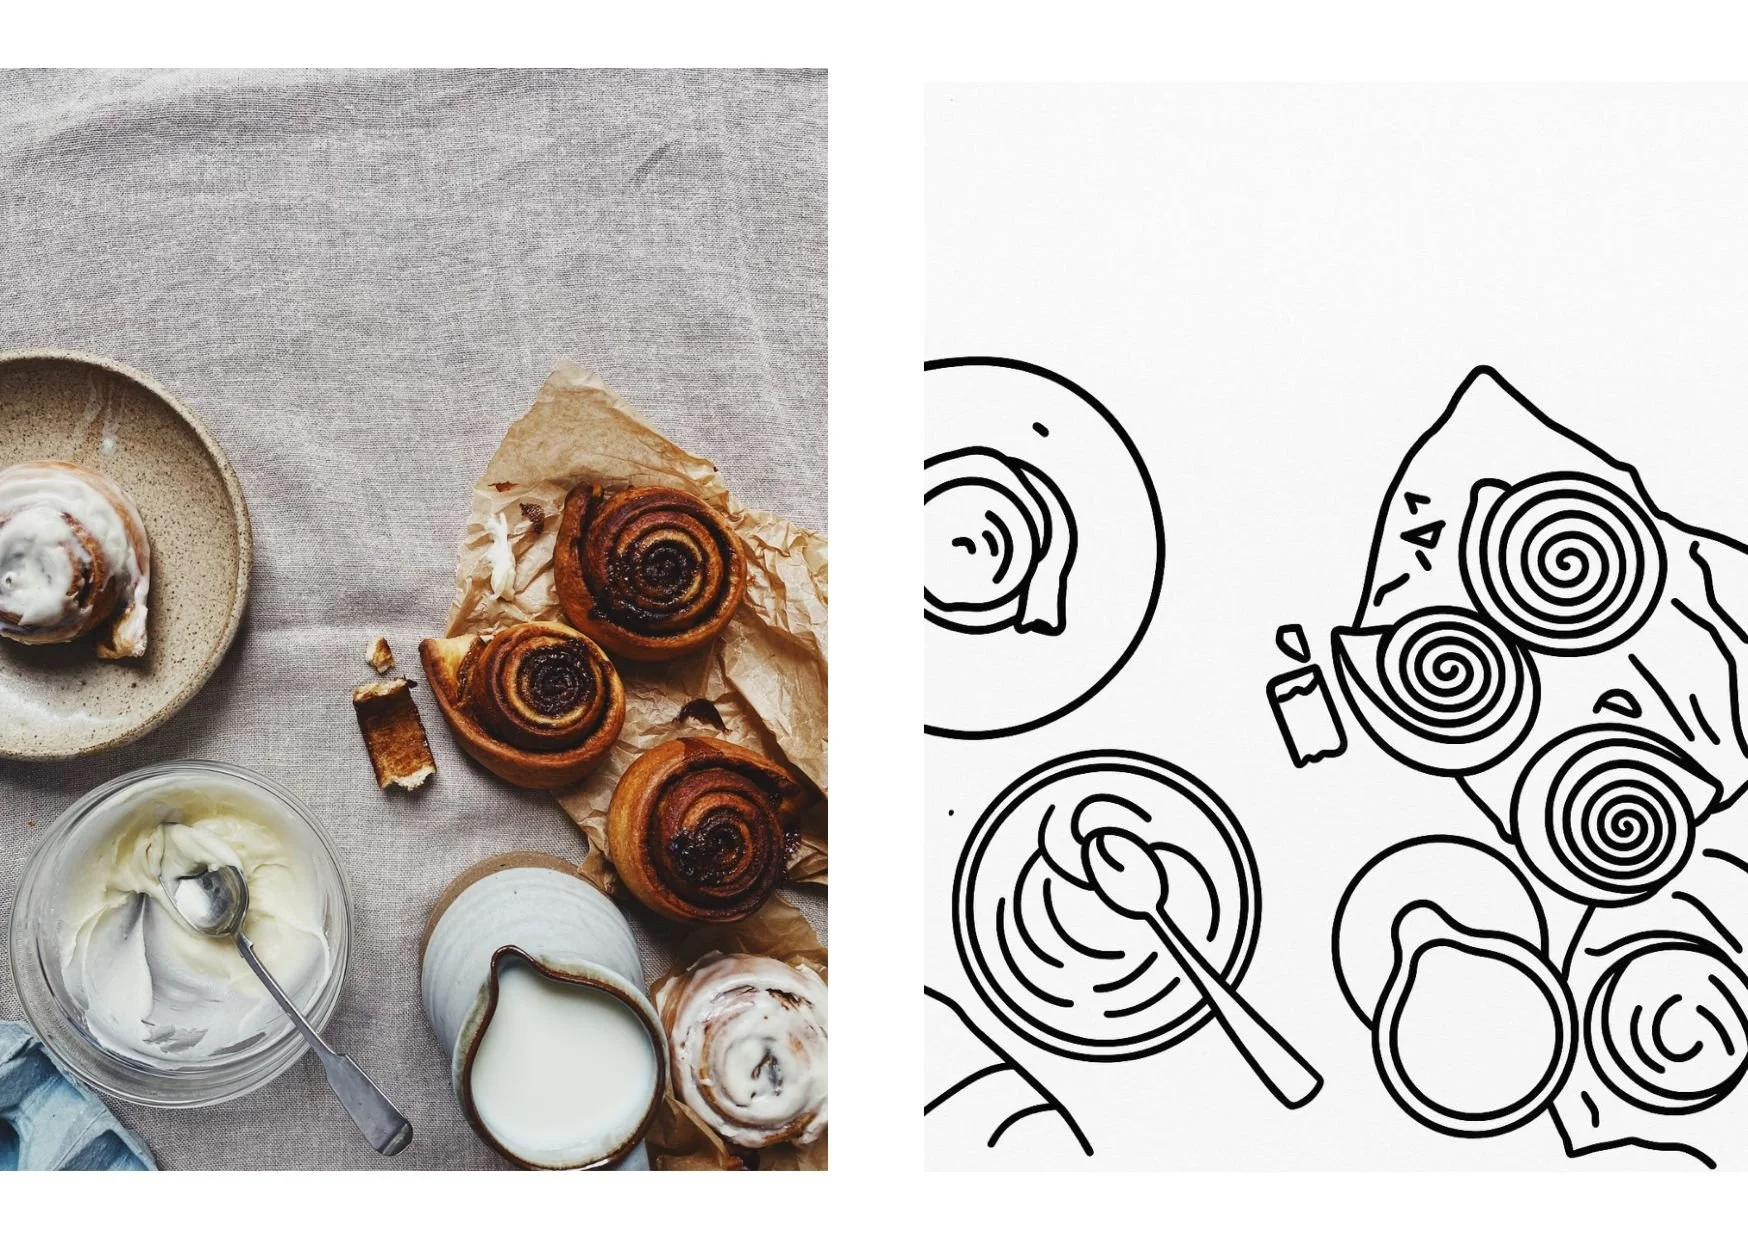
3. Give your composition room to breathe
More props don't necessarily mean a better photograph.
Negative space:
The quieter, emptier areas around your subject can be just as important as the elements you include. It gives the eye somewhere to rest and can make your food feel even more prominent. This is particularly useful when shooting a single dish or product. A little breathing room can make the image feel considered and confident, rather than crowded. It can also help create a particular mood. Generous empty space might feel clean and editorial, while a fuller frame can feel abundant, relaxed and inviting.
Neither is better than the other. It comes down to the story you're trying to tell. And if you're creating content for Instagram or a brand campaign, remember to think about the final format before you start styling. A composition that looks beautiful in a square photograph might feel completely different when cropped into a vertical Reel.
4. Use layers to create depth
One of my favourite things about food photography is that you're not just capturing the food, you're creating a little world around it.
Layers can help bring that world to life. A plate in the foreground, a bowl of ingredients further back, a folded linen napkin or a hand entering the frame can all help create a sense of depth. Instead of everything feeling flat against the surface, the image begins to feel more dimensional and immersive. This is especially useful when shooting from a three-quarter angle, where you can bring different elements into the foreground and background.
For overhead photography, you can create interest in a different way, using the arrangement of plates, ingredients and props to build a sense of movement across the frame. The key is to consider how the elements relate to one another, rather than simply filling every available space. And don't forget that depth isn't just visual. In food videography, movement between the foreground and background can make a scene feel even more alive.

5. Compose for the story, not just the photograph
This is something I always come back to: what do you want the viewer to feel?
A cosy weekend baking scene might call for a slightly imperfect arrangement, scattered crumbs and a tea towel that looks as though it's just been used. A premium product campaign might need cleaner lines, more deliberate spacing and a much more considered arrangement. And a recipe Reel might need room for hands to move into the frame, ingredients to be added and the finished dish to be revealed. The same dish can look completely different depending on how you compose it.
Before you shoot, think about the mood, the purpose of the content and where it will be seen. This gives you a starting point for deciding which angle, framing and arrangement will work best. It's also why I don't think composition can be separated entirely from styling, lighting and movement. They all work together to create the final result.
A little reminder before your next shoot
You don't need to memorise a list of composition rules or buy more props to start improving your food photography. Instead, try approaching your next shoot with a little more intention. Decide what the hero is, think about where the viewer's eye will go and consider what each element adds to the story. Then take a moment to look at the frame as a whole. Is anything distracting from the food? Does the image feel balanced? Is there a reason for everything you've included? Those small decisions can make a real difference.
And if you've ever wondered how to take these ideas further, from choosing your composition and styling your scene to creating beautiful movement and editing your final video, that's exactly what I explore in my food videography resources below...
Want to take your food content further?
If you're ready to feel more confident creating food photos and reels, I've created two resources to help you along the way.
The MOTION Toolkit is a practical starting point for your food videography journey, and includes one of my composition overlays to help you think more intentionally about how you frame your shots.
And if you'd like to develop your skills more comprehensively, The MOTION Method Food Videography & Reels Course includes all nine of my composition overlays, alongside lessons on styling, lighting, composition and editing to help you understand how to bring all the elements together.
Whether you're creating content on your phone or using a DSLR or mirrorless camera, these resources are designed to help you understand why a shot works, so you can start making more intentional creative decisions of your own. And remember to use CODE COMPOSITION15 for 15% off!
